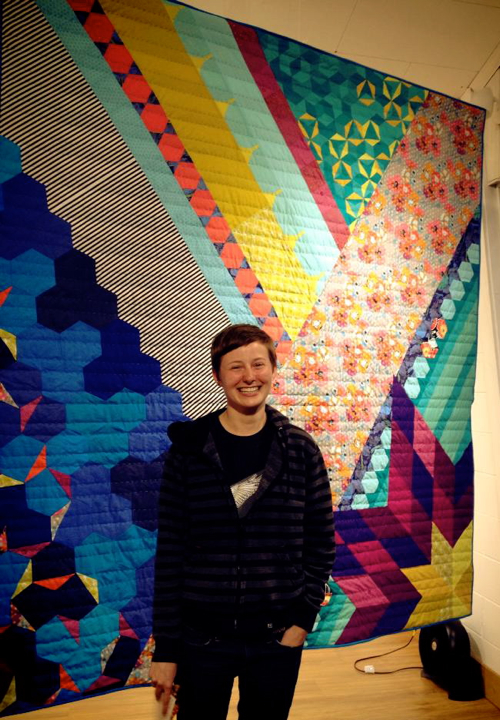
 Hi, I’m Anna. Here I am with a quilt I made. I love to quilt and I’m fascinated by the creative process, so that’s what I’m going to share on this blog. Here’s a glimpse into how I started the quilt pictured above.
 I decided to make this quilt to participate in a star quilt challenge through the Seattle Modern Quilt Guild. My first roadblock was determining how I’d incorporate a star into the quilt, since I’m usually not very aesthetically drawn to star quilts.
 What I did know early on was that I’d base the quilt on the back of a hoodie I’d recently made for myself. Special thanks to my friend Tsige for sneakily snapping a photo of it while we were walking on a rainy Seattle day.
 The start of the project coincided with a trip I took back to my hometown of Sequim. My mom encouraged me to sketch out my ideas, so we could play around with them. At first I was resistant to the idea, since I usually jump right in and start sewing without sketching or formulating any ideas first. However, I’m glad my mom gave me the push to sketch first, since it provided me with an opportunity to explore a few options before committing to one through snipping and sewing.
 Mom and I started playing around with scraps of paper and realized the negative space of hexagons could be arranged to create a five pointed star.
 Interestingly enough, while the negative space star was a huge part of the design idea from the beginning, it eventually got cut from the final quilt. Fascinating how those things happen, huh? The evening of brainstorming was filled with pulling out paper, markers, tape, glue sticks, and rulers as we attempted to convey different design ideas to each other.
 Another key component of the star aspect of the quilt at the beginning stages which fell to the wayside by the end was the idea of quilting five pointed stars along the edge of a line of hexagons in the lower right corner. These ideas grew from how I didn’t want the quilt to scream, “I’m a star quilt!” I wanted the star aspects of the quilt to be more subtle – hidden in the negative space and hand quilting.
 After I had a general sense of the direction the quilt was headed, I pulled out the bin of fabric I’d brought home and started draping them on my brother’s bed. Quilts look surprisingly different on a bed in comparison to being laid out flat, since a good chunk hangs off the edge.
 While adjusting the fabrics and swapping them out to try different combos, it struck me that I was designing my star quilt on top of a star quilt made by my grandmother. I paused for a moment and smiled at the fact that her star quilt was poking out underneath. Check out her quilt below without mine in the way:
 Grandma gave this quilt to my brother as a high school graduation present. One of the things I absolutely love about quilting is that it draws on tradition, while providing the freedom and flexibility for both of us to create quilts which appeal to us.
 The picture above was taken in 1947 and it shows my grandma holding her first of eight kids – my Uncle Paul. She’s 31 years old in the picture – only 6 years older than I am now! She’s the person I’m named after and I’m happy I’ve picked up her passion for quilting. At the moment she’s 97 years old. Right around the time she stopped quilting is when I picked it up.
 As I played around with the arrangement, I’d ask my mom questions like, “What do you think of that? Which of these fabrics do you think is a better fit for this spot?” I really appreciate her willingness to act as a sounding board and provide feedback. By the end of the night the layout felt right.
 The next morning Mom offered to start ironing fabrics. Talk about the ultimate help for a quilter!

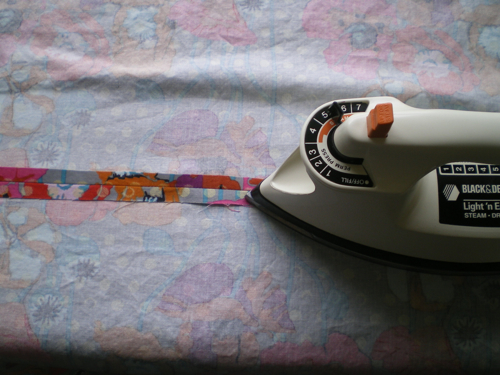 I started sewing together wide chunks of fabric, cutting English Paper Piecing templates, and playing around with the size and placement of lines of hexagon.


 Mom and I taped together paper to create jumbo hexagons to make the five pointed negative space star and I even got them basted before I returned to Seattle. At that point in time I was still thinking that star would end up on the final quilt.

 Before heading back to Seattle I felt like we’d made quite a bit of headway. What had started as an idea before coming to Sequim was starting to take shape and major chunks of it were sewn together!
 Plus, it even looked quite a bit like a magnified version of my hoodie, which was what I was going for all along. I’ll share more about how I worked on this quilt soon. Thanks for reading my first blog post on this site.


Excellent web site you have got here.. It’s difficult to find high
quality writing like yours nowadays. I really appreciate people like
you! Take care!!
Oh wow, thank you so much for the kind words!
Hi Anna,
Love, love, love this quilt. Will you be posting anymore about the creation of this quilt? I’d love to see more about your process. Cheers jess
Hi Jess! Thank you for your kind words. I’m finally jumping back on the blogging train again :) So yes, I will post more about the creation of this quilt. Thanks for taking an interest in it! Anna B.
This quilt is just stunning. I keep running across it on Pinterest and digging for a pattern. I finally tracked down your blog and I love this view into your creative process. I hope you don’t mind if I use it for inspiration. Like you, I tend to jump in without a solid pattern, but this quilt incorporates so much of what I want when I finally get around to making a king size quilt for my own bed. Thanks for sharing this beauty with the world!
Hi! Happy to hear you enjoy the quilt. I’ve never made a pattern for it because it involved a lot of random steps and I like winging it when I quilt. Feel free to use it as inspiration. Happy quilting! Anna B.